Forget the traditional, labor-intensive mooncakes! This year, indulge in the delightful simplicity of Snowy Mooncakes, a delightful twist on a classic. These melt-in-your-mouth treats boast a delicate, snow-white exterior and a creamy, subtly sweet coconut filling that's both refreshing and utterly satisfying. Perfect for a moonlit celebration or a cozy afternoon tea, Snowy Mooncakes offer a delightful balance of texture and flavor, requiring minimal effort while delivering maximum deliciousness. They are the perfect combination of elegant presentation and easy execution.
This recipe simplifies the mooncake-making process, allowing you to focus on the joy of creating and sharing these beautiful treats. With just a few readily available ingredients and straightforward techniques, you'll be crafting these enchanting mooncakes in no time. Ready to embark on this delightful culinary adventure? Let's dive into the step-by-step instructions to create your own batch of irresistible Snowy Mooncakes.
Tools Needed
- Non-stick pot
- Silicone whisk
- Sieve
- Scale
- Food processor (optional)
- Microwave or steamer
- Heat-proof lid
- Mixing bowls
- Gloves (optional)
- Mooncake mold
- Rolling pin
- Parchment paper
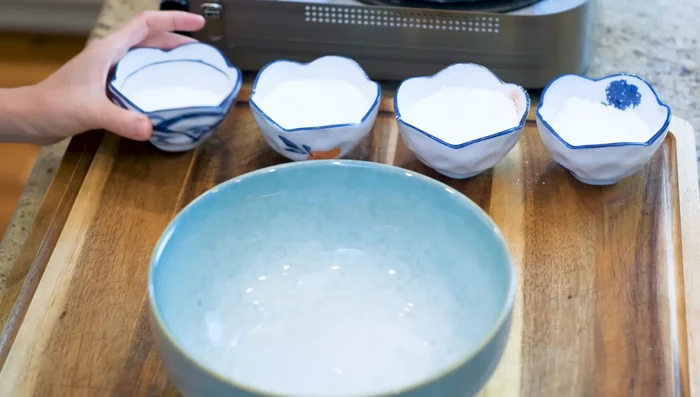
Ingredients
Step-by-Step Instructions
Step 1. Prepare the Coconut Filling
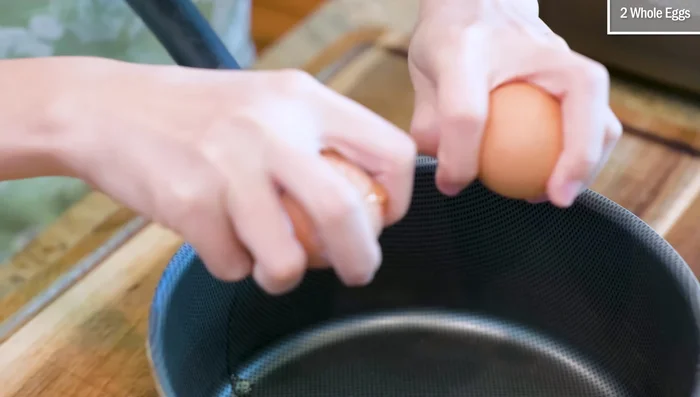
- Crack two eggs into a non-stick pot. Remove any shell fragments.
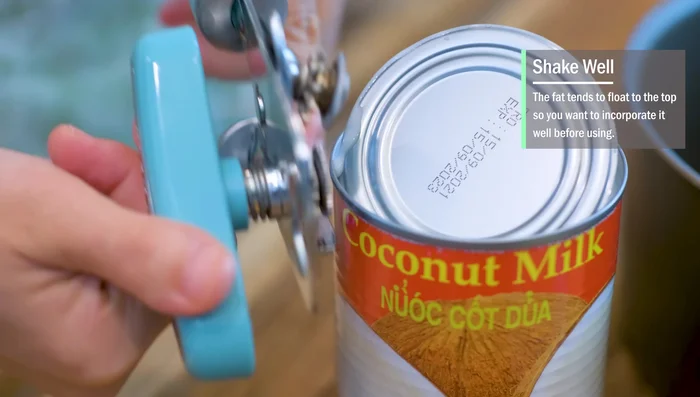
- Add 200ml coconut milk (shake well), sugar, and cake flour (or all-purpose flour) to the pot. Stir with a silicone whisk. Sieve the mixture to remove lumps.
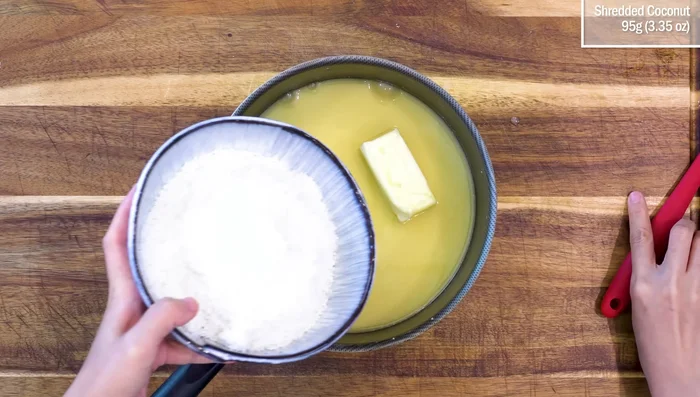
- Add 4.5 tbsp butter and 95g shredded coconut. Stir constantly over low heat until the mixture thickens (about 10 minutes).
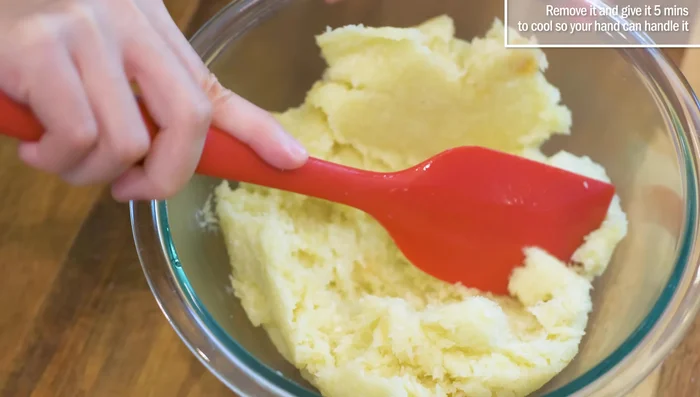
- Let the filling cool to lukewarm (5 minutes). Portion into 30g balls and refrigerate for 1 hour or until cold.
Step 2. Make the Mooncake Wrapper
- Combine 50g sugar, 50g glutinous rice flour, 50g rice flour, 35g wheat starch, and the remaining coconut milk in a bowl. Mix well.
- Microwave the wrapper mixture (covered with a heat-proof lid but not airtight) in 1.5-minute intervals, stirring and microwaving for another minute and then 30 seconds, until partially solidified (total cooking time 3 minutes). Let it cool.
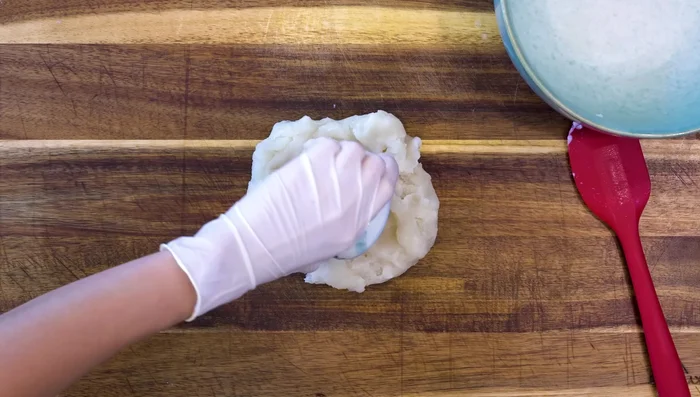
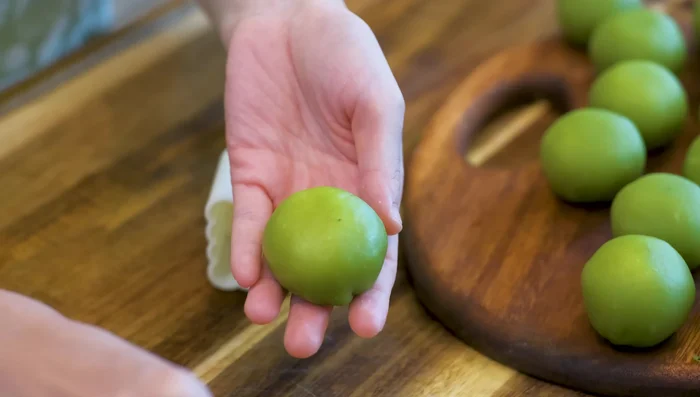
- Add matcha powder (optional) and knead the wrapper until smooth and non-sticky (about 5 minutes). Portion into 20g balls.
Step 3. Assemble and Shape the Mooncakes
- Roll out each wrapper ball, place a filling ball in the center, seal, and shape.
- Microwave 2 tbsp glutinous rice flour for 30 seconds (or toast in a pan) to use as dusting powder.
- Dust the mooncake balls with cooked glutinous rice flour, place them in a mooncake mold, and press to shape.

Read more: Sugar-Free Red Date Cake: A Healthy Chinese New Year Treat
Tips
- Use fine shredded coconut for a better texture in the filling.
- If you don't have cake flour, use all-purpose flour.
- The cooking time for the wrapper in the microwave may vary depending on the power; check and adjust accordingly.
- Cooling the wrapper slightly before kneading makes it easier to handle.
Nutrition
- N/A
FAQs
1. Can I use a different type of filling for these Snowy Mooncakes?
Absolutely! While coconut is delicious, you can experiment with other fillings like red bean paste, lotus seed paste, or even custard.
2. How long can I store the finished Snowy Mooncakes?
Store them in an airtight container in the refrigerator for up to 3 days. For longer storage, freeze them for up to 2 weeks.
With their delicate texture and irresistible coconut filling, these Snowy Mooncakes are a guaranteed crowd-pleaser. This simple recipe makes the traditional mooncake experience accessible to everyone, proving that deliciousness doesn't have to be complicated. Enjoy the sweet taste of success and happy moon-gazing!