Crispy Taro Duck represents a pinnacle of Cantonese culinary artistry, a harmonious blend of textures and flavors that will tantalize your taste buds. Imagine succulent duck, its skin rendered gloriously crisp, encased in a fragrant, subtly sweet taro crust. The contrast between the crunchy exterior and the tender, juicy meat within is a revelation, a symphony of textures complemented by the earthy notes of the taro. This dish, traditionally a celebratory feast, is surprisingly achievable at home, offering a rewarding culinary adventure for both seasoned cooks and enthusiastic beginners.
This recipe expertly guides you through each stage of preparation, from selecting the perfect duck to achieving that coveted crispy finish. We’ll uncover the secrets to perfectly balancing the flavors and textures, ensuring your Crispy Taro Duck is a resounding success. Prepare to embark on a culinary journey that will transport you to the heart of Cantonese cuisine; let's begin the step-by-step process.
Tools Needed
- Pot
- Knife
- Bowl
- Deep Fryer
Ingredients
- Duck
- Taro
- Ginger
- Spring Onion
- Salt
- Thirteen Spices
- Potato Starch
- Cornstarch
Step-by-Step Instructions
Step 1. Prepare the Duck and Taro
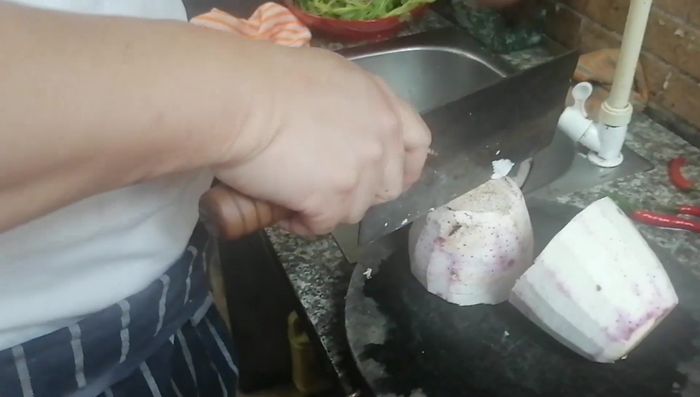
- Peel and cut the taro in half.
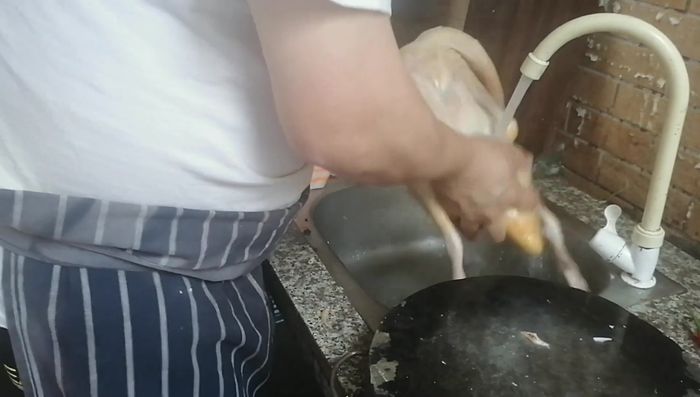
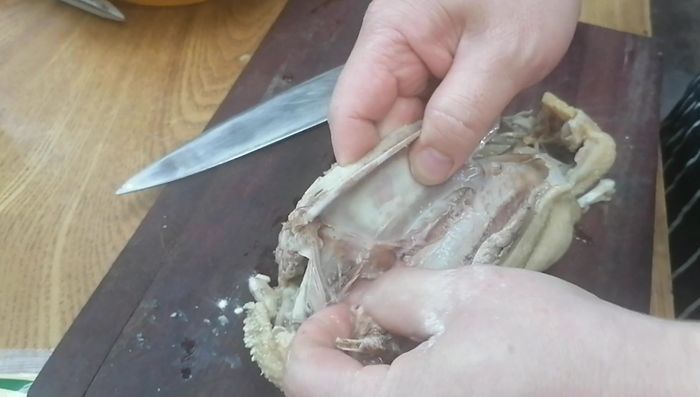
- Clean the duck, removing dark skin and feather roots.
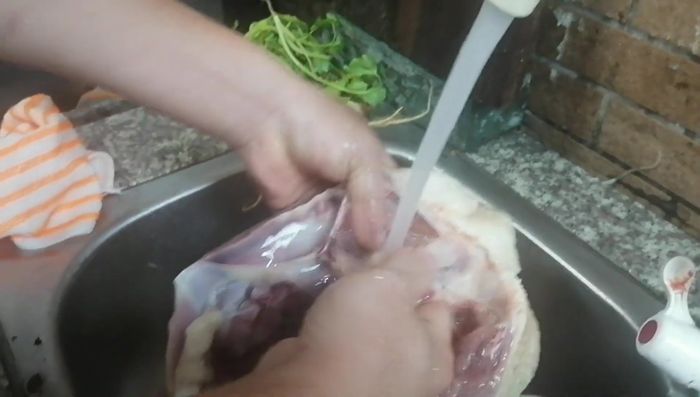
- Remove the duck's internal organs.
- Place taro in a pot, then layer with duck, ginger, and spring onion. Cook over high heat for 50 minutes.

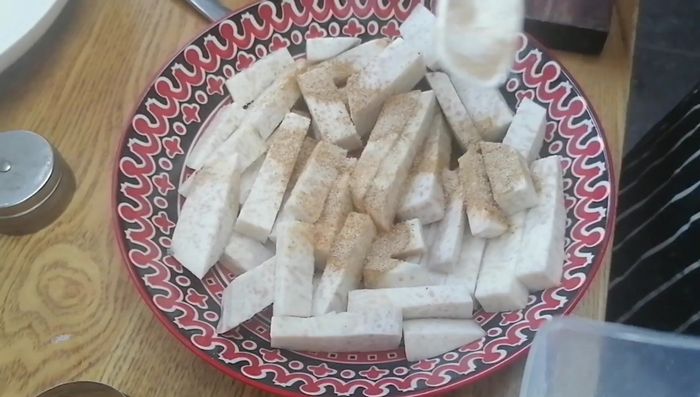
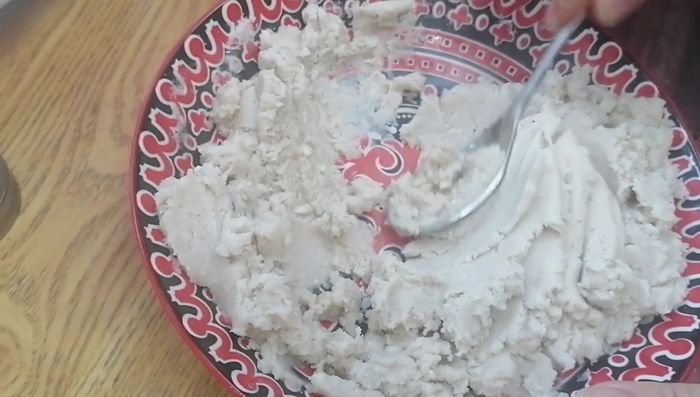
- Mash the cooked taro with salt and thirteen spices.
- Remove any unmashed taro pieces.
- Remove the bones from the cooked duck.
Step 2. Create the Taro Coating and Assemble
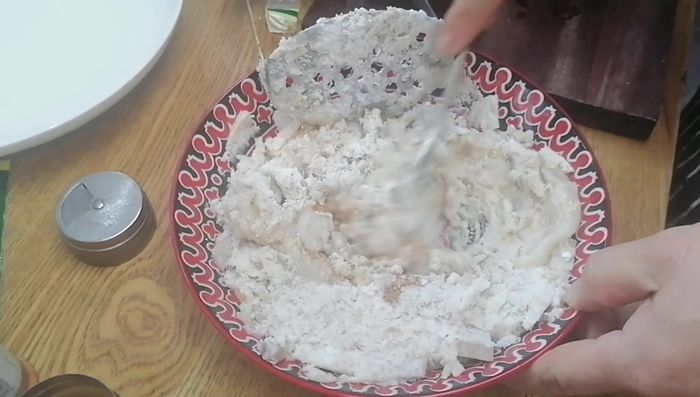
- Prepare the taro dough by mixing the mashed taro with potato starch.
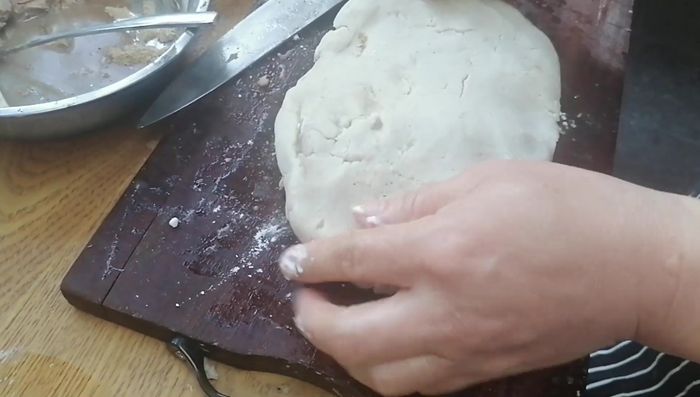
- Wrap the deboned duck with the taro dough, ensuring all edges are sealed. Dust with cornstarch.
Step 3. Deep Fry to Perfection
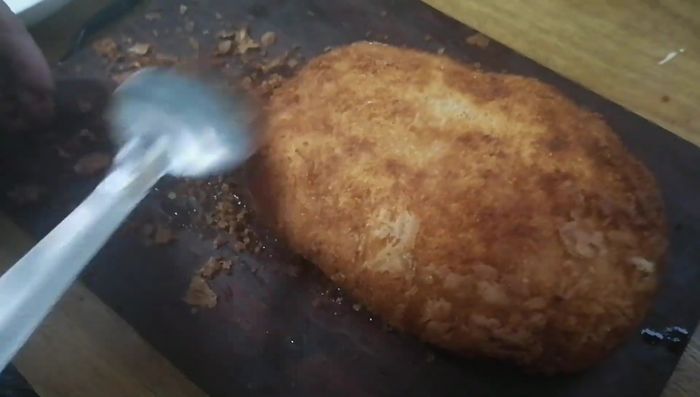
- Deep fry the taro duck in hot oil until golden brown, turning occasionally.
- Scrape off any over-burnt bits.
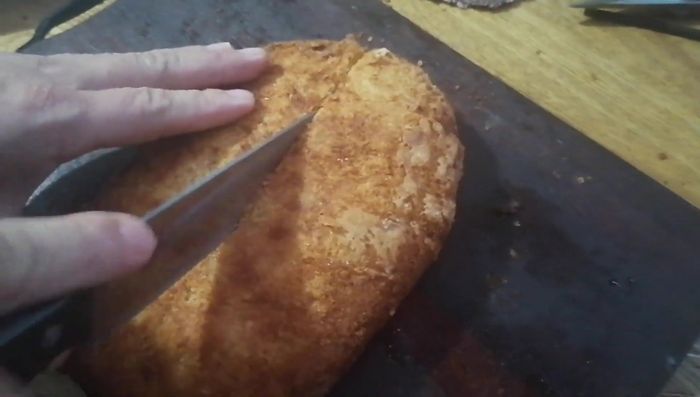
Step 4. Serve
- Cut and serve.
Read more: Super Easy Fall-Off-Bone Chinese Style Ribs: One-Pot Recipe
Tips
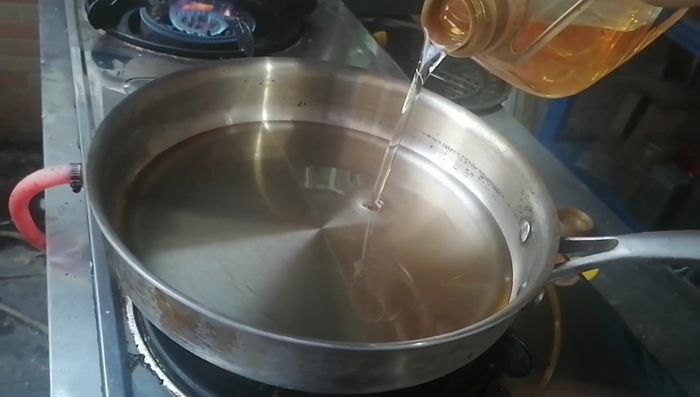
- Maintain a stable frying temperature by carefully pouring oil.
- Listen for the satisfying sound of the crisping duck skin!
Nutrition
- N/A
FAQs
1. Can I use frozen duck instead of fresh?
While fresh duck is ideal for the best flavor and texture, you can use frozen. Make sure to thaw it completely and thoroughly pat it dry before proceeding with the recipe. You may need to adjust cooking times slightly.
2. What if my taro crust isn't getting crispy enough?
Ensure your duck is completely dry before coating it in the taro mixture. High heat is key! If it's not crisping up, increase the oven temperature slightly or use a higher heat setting on your stovetop (if applicable), and be sure to leave adequate space between the duck and other items in the pan.
With its captivating blend of textures and flavors, your homemade Crispy Taro Duck is sure to impress. This dish, though seemingly complex, is achievable with careful attention to detail and the steps outlined in this guide. Enjoy the rewarding experience of creating this Cantonese culinary masterpiece!